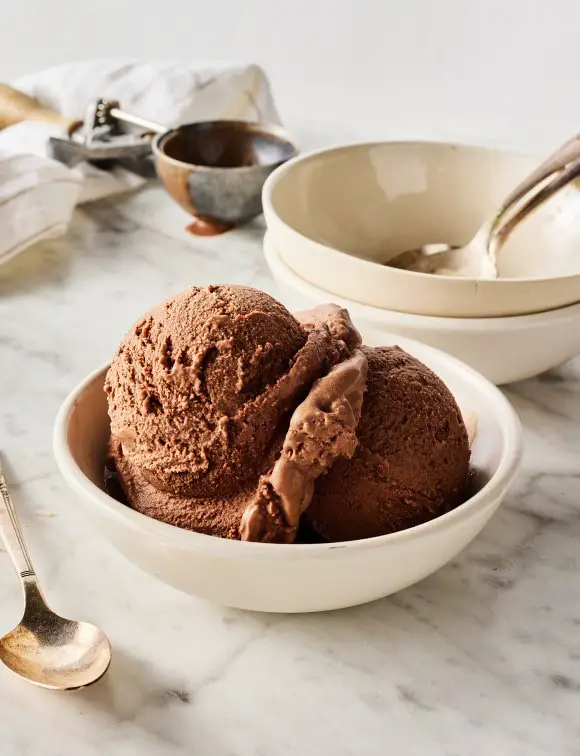
Get ready to whip up the best old-fashioned homemade chocolate ice cream you’ve ever tasted, completely without eggs! This easy, machine-churned recipe is packed with that delightful, intense chocolate flavor you remember from childhood – but even better.
While a rich chocolate custard (like Culver’s) holds a special place in my heart, my journey with A2 dairy has unlocked a world of incredible ice cream possibilities. This raw milk chocolate ice cream recipe is just one of many delightful creations I’ve mastered, alongside favorites like Butterfinger, classic raw milk, Fruity Pebbles, and refreshing Mint Oreo ice cream. It’s time to rediscover true chocolate bliss!
Why You’re Going to Love It Too
- Effortless Preparation: It’s genuinely easy to make, requiring just 7 simple ingredients you likely already have on hand.
- Versatile Texture: Enjoy it as soft-serve right after churning, or freeze it for a firmer, scoopable consistency perfect for cones.
- Authentic Flavor: Delivers that classic, old-fashioned chocolate taste, thanks to the quality cocoa powder.
- Quick Dessert: A fast recipe that can be prepared in 30 minutes or less, making it ideal for spontaneous cravings.
- Generous Yield: Produces ample leftovers, ensuring you’ll have plenty to store and enjoy throughout the week (even for a family of 5).
- Beyond Ice Cream: The churned mixture can be poured into popsicle molds to create delightful homemade fudge bars.
Ingredients and Substitutions Notes:
Crafting this delightful homemade chocolate ice cream, sans eggs, is surprisingly straightforward with just a few key ingredients:
- Unsweetened Cocoa Powder: My go-to is Hershey’s, valued for its flavor and gluten-free label. Feel free to experiment with Dutch-processed for a mellow richness, or even dark cocoa for an intense, dark chocolate ice cream.
- Sweeteners (Cane Sugar & Light Brown Sugar): A blend of cane sugar (or granulated sugar) and light brown sugar creates that authentic, old-fashioned chocolate taste we all cherish.
- Milk (Whole Milk Recommended): While I prefer raw milk, any store-bought whole milk will yield excellent results. You can use 2% or 1%, but for the creamiest outcome, whole milk is highly recommended.
- Heavy Cream: I personally use cream skimmed from our own milk, but store-bought heavy whipping cream is a perfect substitute. While half-and-half might work, expect a less creamy texture.
- Vanilla Extract: For a truly exceptional flavor, I swear by Mexican vanilla extract. Its superior quality elevates every dish it touches.
- Sea Salt: Though table salt is an option, I prefer Redmond Sea Salt for its distinct flavor and natural purity.
How to Make
Before you even think about mixing your ingredients, it is absolutely crucial to pre-freeze your ice cream maker’s canister. If this step is skipped, your ice cream simply won’t freeze properly during the churning process.
My personal habit is to wash the canister immediately after use, then cover it tightly with plastic wrap and return it straight to the freezer. This ensures it’s always perfectly frozen and ready for impromptu ice cream cravings. (If only Cuisinart would make a dedicated lid for these canisters – it’s my one true wish for this fantastic ice cream maker!)
How to Mix It and Freeze It
Begin by whisking together the cocoa powder, sugar, brown sugar, and salt in a large mixing bowl. Next, pour in the whole milk and continue to whisk for 1-2 minutes until all the sugars and cocoa powder are completely dissolved – this crucial step prevents a grainy texture. Finally, whisk in the heavy cream and vanilla extract.
With your ice cream maker already running, pour the prepared mixture into the pre-frozen freezer bowl, ensuring the churn paddle is in place. Secure the cover and let the machine churn for about 20-25 minutes, or until the ice cream achieves a soft, creamy consistency. Once ready, turn off the machine and scoop the delightful soft-serve chocolate ice cream into bowls. For a firmer texture, transfer it to an airtight container and freeze for an additional 2-3 hours before serving.
How to Serve Chocolate Ice Cream
- Toppings Galore: Drizzle with classic toppings like butterscotch syrup, caramel syrup, or strawberry syrup.
- Crunchy Add-ins: Crumble crushed cookies or your favorite candies over the top for extra texture and flavor.
- Warm Cookie Delight: Place a generous scoop of chocolate ice cream on a warm, freshly baked chocolate chip cookie for an irresistible treat.
- DIY Ice Cream Sandwiches: Use it as the luscious filling for homemade gluten-free ice cream sandwiches, a delicious twist from traditional vanilla.
- Classic Sundae Style: Crown your scoops with a dollop of whipped cream and a sprinkle of colorful sprinkles, or for an extra sweet touch, use marshmallow fluff and sprinkles.
Expert Tips and Recipe FAQ’s
My number one expert tip? Always, always pre-freeze your ice cream maker canister well in advance. This is absolutely crucial for proper freezing during churning.
Why is my homemade chocolate ice cream grainy? Graininess often stems from undissolved sugars or cocoa powder. This is precisely why that initial whisking step is so important. I strongly recommend extra whisking in the beginning to ensure all the cocoa and sugars fully dissolve into the milk. If they’re not completely incorporated, your ice cream will indeed turn out grainy.
Should homemade ice cream be so soft? Yes, when it first comes out of the churn, it will naturally have a soft-serve consistency. However, a stint in the freezer will firm it up significantly, allowing for perfectly scoopable portions whether you prefer a bowl or a cone.
How should I store leftover ice cream? Leftovers should always be stored in the freezer, of course! For optimal storage, I highly recommend investing in specialized ice cream containers. I personally use and love these super cool ice cream containers I found online; they’re perfect for keeping 1-2 batches ready for the kids. They perform excellently and are a breeze to clean. You can explore more great options in my comprehensive guide to ice cream accessories and tools.
How long will homemade ice cream last in the freezer? When stored correctly in an airtight container to prevent freezer burn, I’ve found that homemade ice cream generally maintains its best quality for about 3-4 weeks.
Do I need an ice cream maker to make this recipe? Yes, for this specific recipe, an ice cream maker is truly necessary to achieve the desired creamy texture. I highly recommend the model I use, which is this ice cream maker. It’s user-friendly and efficiently churns up to 2 quarts (or half a gallon) of ice cream per batch.