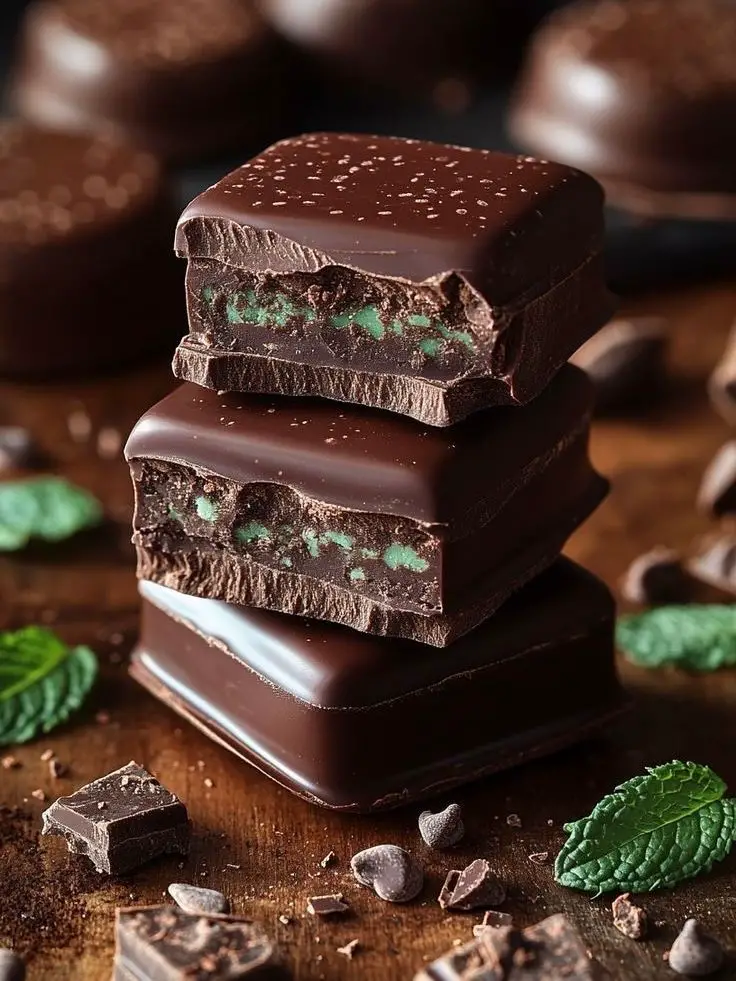
Few flavor combinations are as iconic and universally loved as mint and chocolate. The cool, invigorating essence of mint paired with the rich, velvety depth of chocolate creates a sensory experience that’s both indulgent and refreshing. Whether you’re reminiscing about childhood favorites like After Eights or savoring a luxurious mint truffle, this duo never fails to delight.
But what if you could recreate that magic at home? With just a few simple ingredients and a bit of patience, you can craft your own homemade mint chocolates—perfect for gifting, sharing, or sneaking from the fridge when no one’s looking.
🧾 Ingredients
For the Chocolate Shell
- 8 oz (225g) high-quality milk or dark chocolate, chopped
- 1 tbsp unsalted butter
For the Mint Filling
- 6 oz (170g) milk chocolate, chopped
- ¼ cup (60ml) heavy cream (at least 30% fat)
- 1 tbsp unsalted butter
- ¼ tsp peppermint extract (adjust to taste)
🍫 How to Prepare Homemade Mint Chocolates
Step 1: Melt the Chocolate Shell
- In a heatproof bowl over a pot of simmering water (double boiler), melt the chopped chocolate and butter.
- Stir until smooth, then remove from heat and let cool slightly.
Step 2: Coat the Molds
- Spoon a small amount of melted chocolate into each cavity of a silicone chocolate mold.
- Use a pastry brush to coat the sides evenly.
- Tip the mold upside down to drain excess chocolate.
- Freeze for 10 minutes to set.
Step 3: Make the Mint Filling
- In another heatproof bowl, melt the milk chocolate, cream, and butter over low heat.
- Stir until smooth, then remove from heat and let cool for 10–15 minutes.
- Stir in the peppermint extract.
Step 4: Fill and Seal
- Spoon the mint filling into the chocolate shells, filling each about ¾ full.
- Tap the mold gently to remove air bubbles.
- Cover with remaining melted chocolate and smooth the tops.
- Refrigerate for 30–60 minutes until firm.
Step 5: Unmold and Enjoy
- Carefully pop the chocolates out of the mold.
- Store in an airtight container in the fridge for up to 1 month—or freeze for longer storage.
❓ 5 Common Questions & Answers
- Can I use mint extract instead of peppermint extract?
Yes, but note that mint extract is usually a blend of spearmint and peppermint. Peppermint extract gives a sharper, more refreshing flavor. - What if I don’t have a chocolate mold?
Use a mini muffin tin lined with paper cups. The result will be more like layered mint cups, but still delicious. - Can I make these vegan?
Absolutely! Use dairy-free chocolate and substitute coconut cream for heavy cream. Choose a plant-based butter alternative. - How do I prevent the chocolate from seizing?
Make sure no water touches the chocolate while melting. Use dry utensils and bowls, and melt slowly over low heat. - Can I add color to the filling?
Yes! A drop of green food coloring can give your mint filling a festive look. Use gel coloring to avoid adding excess liquid.
🌟 The Secret to Success
The key to perfect homemade mint chocolates lies in three essential tips:
- Use high-quality chocolate: The better the chocolate, the smoother the texture and richer the flavor.
- Don’t rush the cooling process: Let the filling cool before adding it to the shells to avoid melting the outer layer.
- Tap out air bubbles: After filling the molds, tap them gently on the counter to ensure a smooth, professional finish.
Bonus tip: If you have leftover filling and chocolate, mix them together, chill until firm, roll into balls, and dip in chocolate to make mint chocolate truffles!
🎁 Final Thoughts
Homemade mint chocolates are more than just a treat—they’re a celebration of flavor, craft, and nostalgia. Whether you’re making them for a holiday gift box, a romantic gesture, or a personal indulgence, these little bites of bliss are sure to impress.
So grab your apron, melt some chocolate, and let the minty magic begin. 🍫🌿