Discover the joy of baking your own sourdough bread at home with our easy-to-follow guide. Making sourdough is a rewarding process that requires patience, but the result is well worth the effort.
With this simple sourdough recipe, you’ll be able to create delicious, crusty loaves that are perfect for any occasion. Whether you’re a seasoned baker or just starting out, our step-by-step instructions will help you achieve professional-quality results.
By following this guide, you’ll learn the basics of creating a sourdough starter and baking a beautiful loaf. Get ready to fill your kitchen with the aroma of freshly baked artisan bread.
The Magic of Sourdough Bread
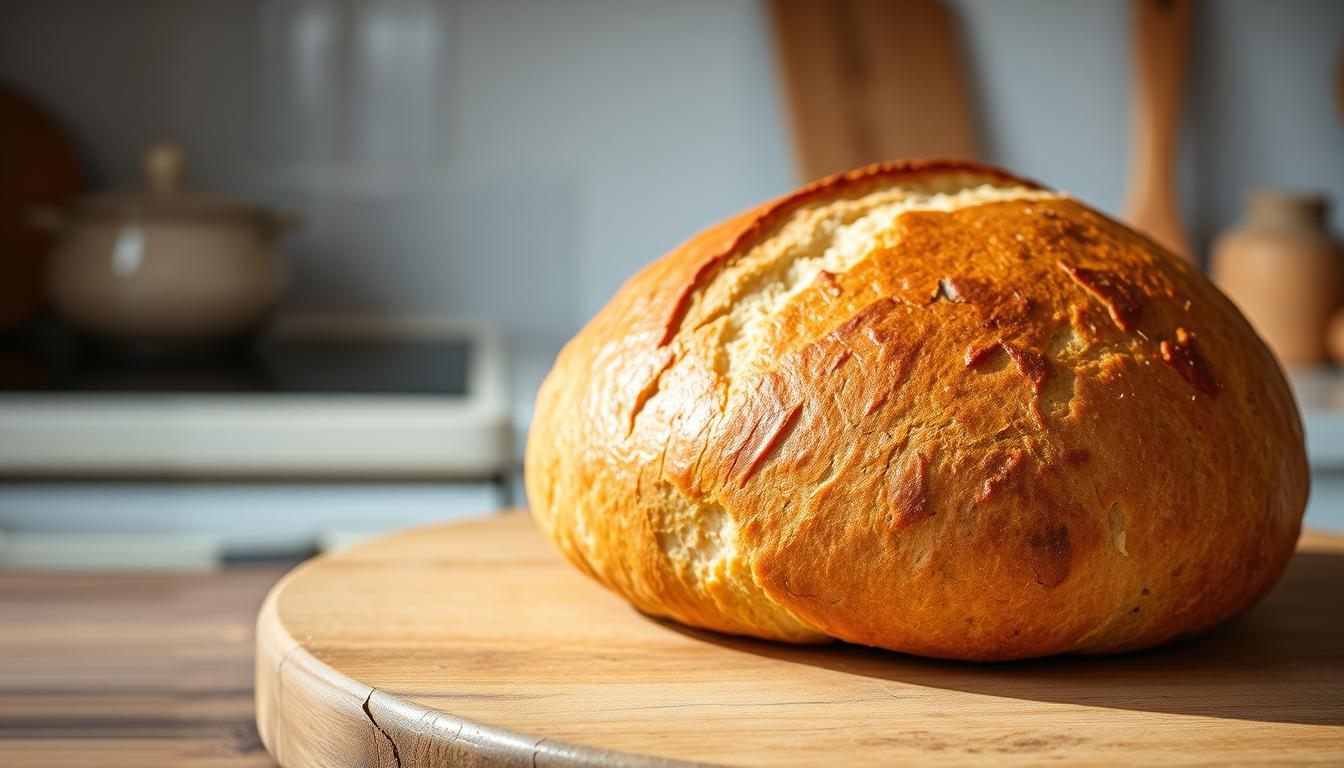
There’s something magical about sourdough bread, from its tangy taste to the process of creating it from scratch. The allure of homemade sourdough bread lies in its unique flavor profile and chewy texture, characteristics that have captivated bread enthusiasts for centuries.
Crafting artisan sourdough bread is not just about following a recipe; it’s an art form that requires patience, dedication, and a bit of science. The process of fermenting the dough, allowing it to rise, and then baking it to perfection is both therapeutic and rewarding.
The end result is a loaf that’s not only delicious but also tells a story of tradition and craftsmanship. Whether you’re a seasoned baker or just starting out, the journey of creating your own sourdough is sure to be a fulfilling experience.
As you embark on this journey, you’ll discover the joy of working with a natural starter, understanding the nuances of fermentation, and ultimately, enjoying the fruits of your labor – a delicious, crusty loaf of homemade sourdough bread.
Understanding the Science Behind Sourdough
At the heart of sourdough bread lies a complex ecosystem where microorganisms play a crucial role. The process of creating sourdough starter guide involves cultivating wild yeast and bacteria present in the environment and the flour.
This natural process is what sets traditional sourdough bread apart from other types of bread. The lactic acid produced during fermentation gives sourdough its characteristic tanginess and contributes to its longer shelf life.
The symbiotic relationship between yeast and bacteria is the backbone of sourdough bread making. Yeast is responsible for the fermentation process, producing carbon dioxide and causing the dough to rise. Meanwhile, bacteria, particularly lactic acid bacteria, ferment the sugars and produce lactic acid, contributing to the bread’s flavor and texture.
Together, yeast and bacteria create a balanced ecosystem that is both resilient and flavorful. Understanding this delicate balance is key to creating a robust sourdough starter and, ultimately, a delicious loaf of traditional sourdough bread.
Essential Ingredients for Sourdough Bread
When it comes to making sourdough bread, the quality of your ingredients can make all the difference. The right ingredients not only ensure a delicious loaf but also contribute to the bread’s texture and overall character.
The foundation of sourdough bread is flour. You can use various types of flour, such as all-purpose flour, bread flour, or a mix that includes whole wheat, rye, or spelt. The protein content in the flour is crucial as it affects the dough’s strength and structure. For a more complex flavor, consider using a blend of different flours.
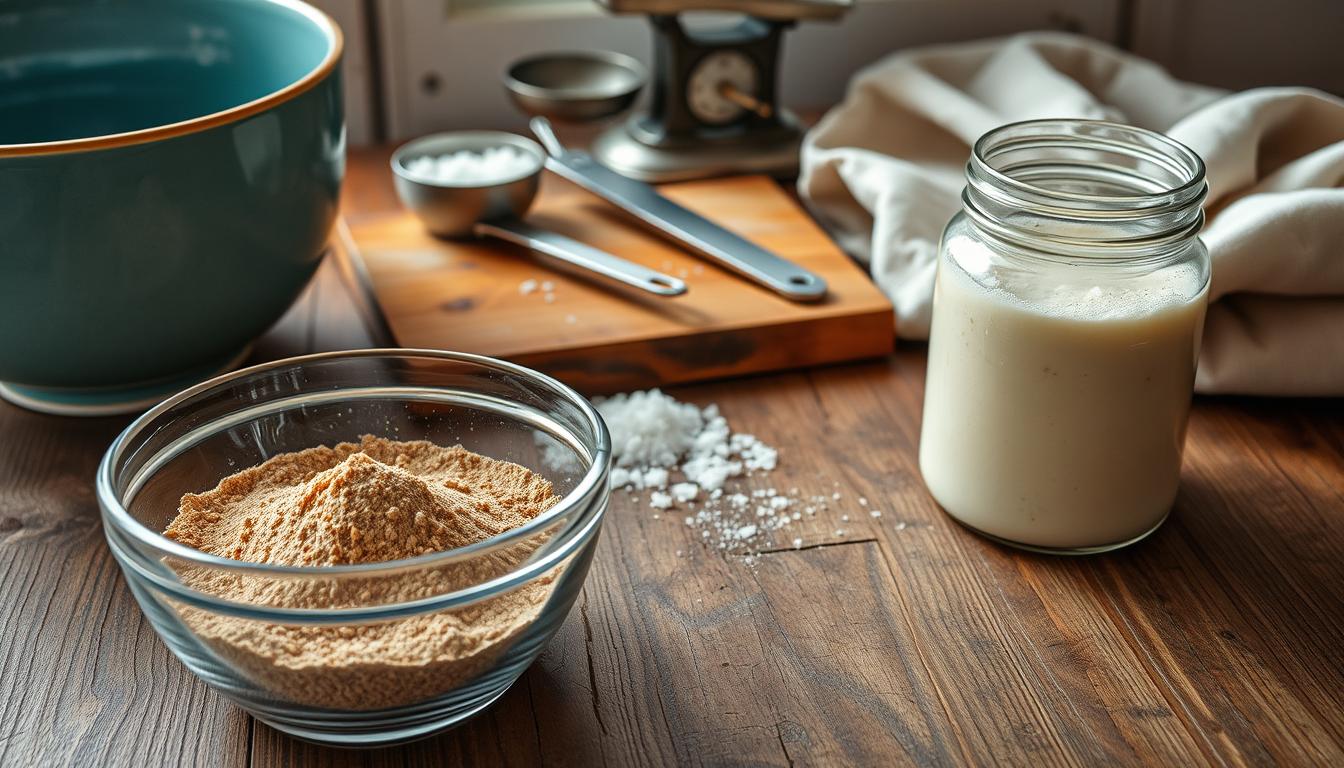
Water is another critical ingredient. The quality of the water can significantly impact the flavor and texture of your sourdough. Use filtered or bottled water if your tap water is heavily chlorinated or contains other impurities that might affect the natural yeast and bacteria in your dough.
Additionally, salt plays a vital role in sourdough bread making. It enhances the flavor and helps control the fermentation process. You can use any type of salt, but avoid iodized salt as it can inhibit the growth of your sourdough starter.
Lastly, the sourdough starter is the heart of your bread, providing the natural yeast and bacteria needed for fermentation. A healthy, active starter is essential for making a great sourdough bread.
Equipment You’ll Need
Having the proper equipment is key to successful homemade sourdough bread. While the ingredients are simple, having the right tools can make a significant difference in the quality of your bread.
Essential Equipment for Sourdough Baking
To get started, you’ll need a few basic items. A large mixing bowl is necessary for combining your ingredients. A stainless steel or glass bowl is preferred because it doesn’t retain odors or flavors. You’ll also need a measuring scale for accurate measurements, as sourdough baking is sensitive to ingredient ratios.
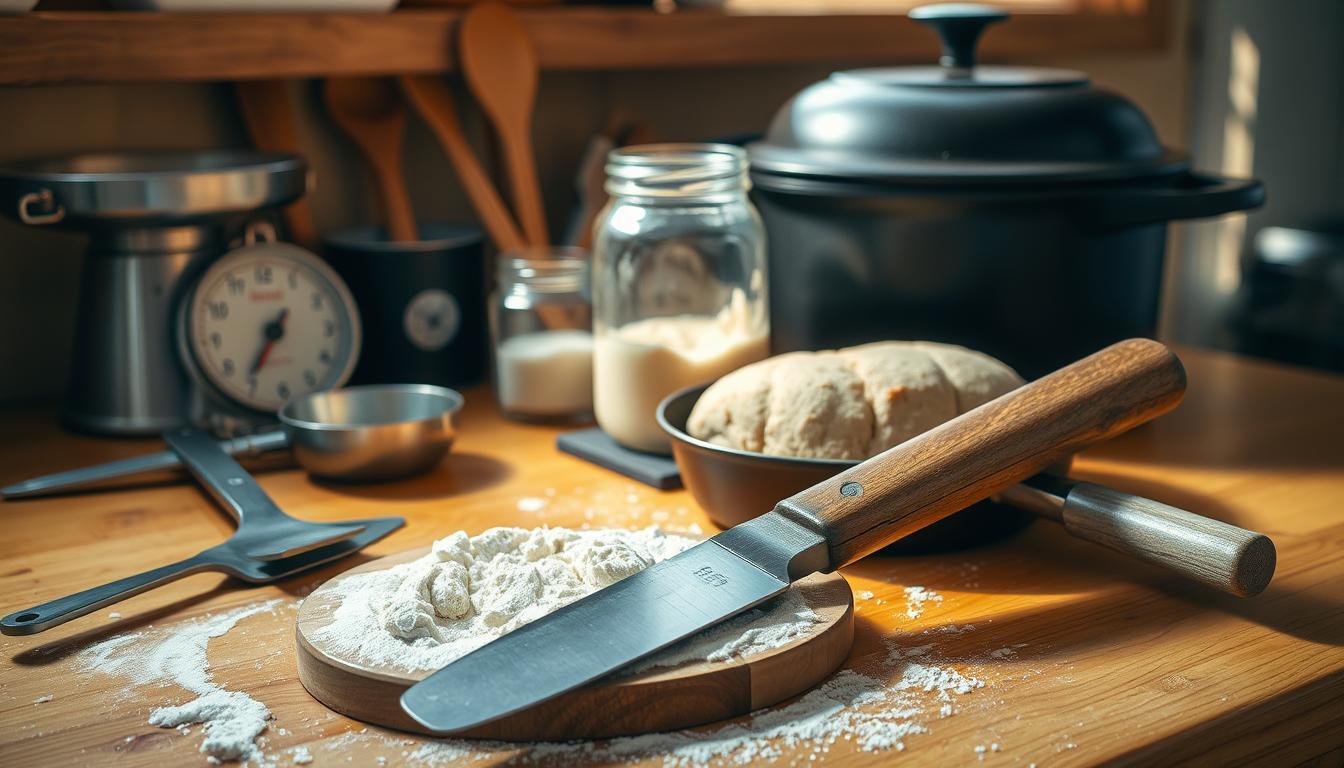
For mixing and handling the dough, a dough whisk or a wooden spoon is handy. A dutch oven or baking stone is crucial for achieving that perfect crust. The dutch oven traps steam, mimicking a professional steam-injected oven, while a baking stone provides a hot surface for even baking.
Following these sourdough baking tips and investing in the right equipment will set you up for success in making delicious homemade sourdough bread.
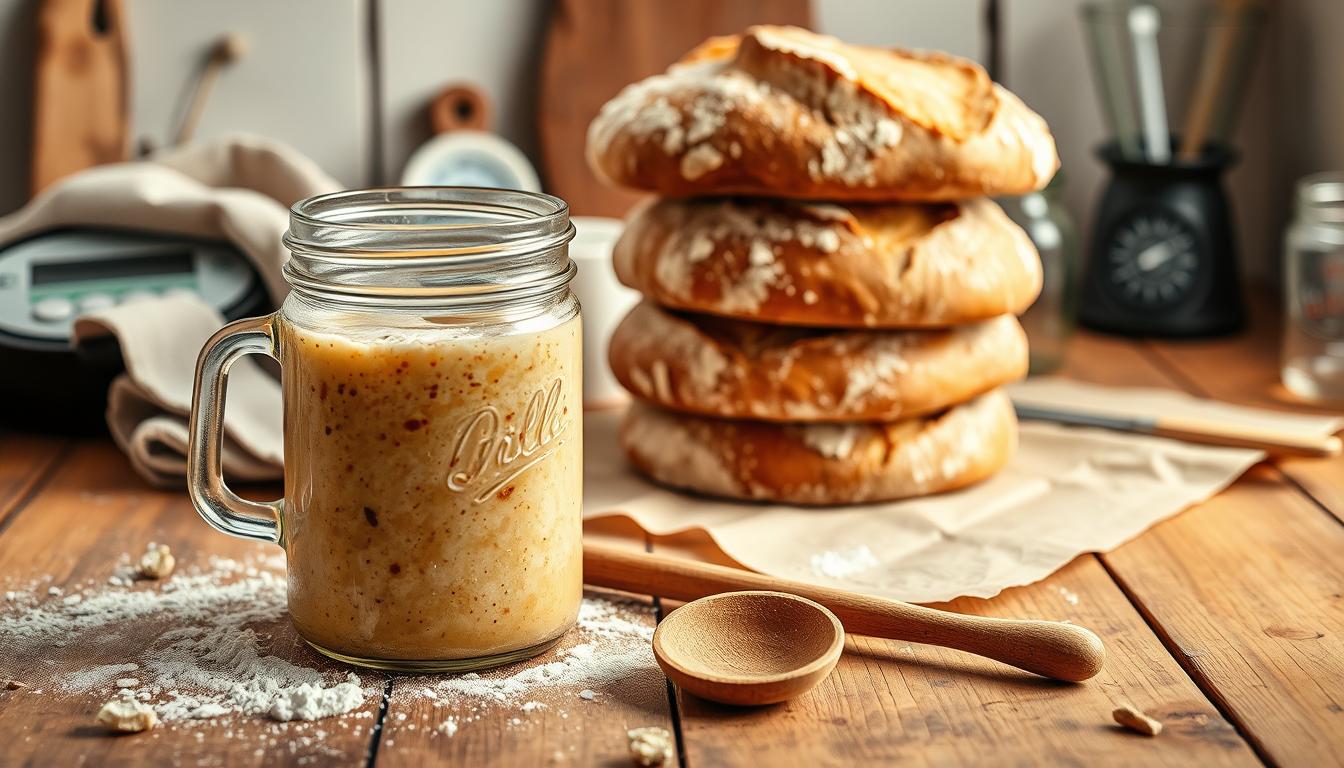
Creating Your Sourdough Starter
The journey to artisan sourdough bread begins with creating your very own sourdough starter. This natural yeast culture is the heart of sourdough baking, giving your bread its characteristic flavor and texture.
To create your sourdough starter, you’ll need just two ingredients: flour and water. It’s recommended to use a non-chlorinated water and a type of flour that’s rich in nutrients, such as whole wheat or rye flour for the initial mix. The ratio is simple: equal parts of flour and water by weight.
Mix 1/2 cup of flour with 1/2 cup of water in a clean glass or ceramic container. Cover it with a cloth or plastic wrap and let it rest in a warm, draft-free place. The first mixture is the beginning of your sourdough starter’s life, and it’s normal for it to look a bit lifeless at first.
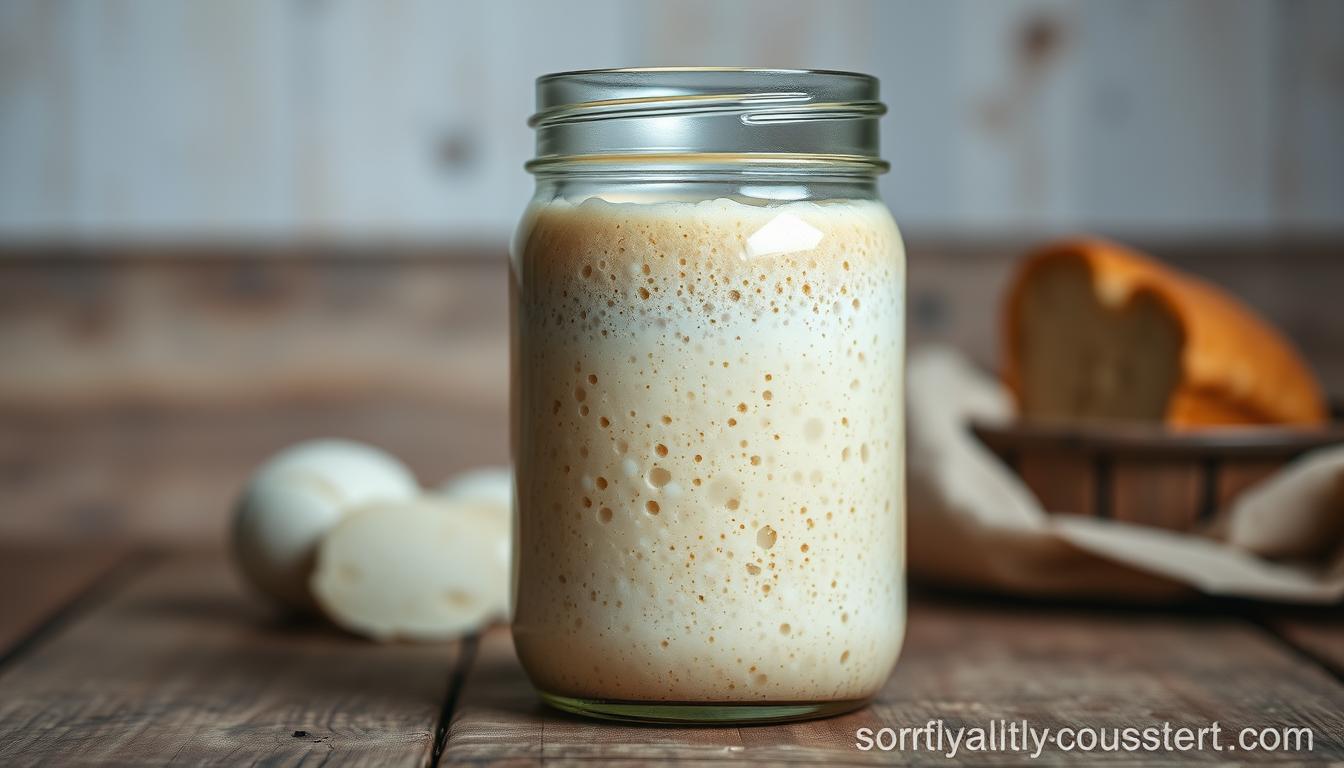
Over the next few days, you’ll need to feed your starter regularly. Discard half of it and add another 1/2 cup of flour and 1/2 cup of water. This process, called “feeding your starter,” helps the natural yeast and bacteria grow. You’ll start to notice bubbles and a tangy aroma, signs that your sourdough starter is becoming active and healthy.
After about 7-10 days of regular feeding, your sourdough starter should be bubbly, nearly double in size after feeding, and have a tangy smell. It’s now ready to use in your artisan sourdough bread recipe. Regular maintenance is key to keeping it alive and healthy.
Creating a sourdough starter is a rewarding process that connects you with the art of bread-making. With your new starter, you’re one step closer to baking delicious artisan sourdough bread.
Maintaining Your Sourdough Starter
A well-maintained sourdough starter is the backbone of any successful sourdough bread recipe. To achieve the perfect loaf of traditional sourdough bread, you need to ensure your starter is healthy and active.
Feeding your sourdough starter is a crucial step in maintaining its health. Use a mixture of equal parts flour and water to feed your starter. The frequency of feeding depends on how you store your starter. If you bake regularly, you can keep your starter at room temperature and feed it once a day.
If you don’t bake frequently, it’s better to store your starter in the refrigerator to slow down its activity. In this case, you can feed it once a week. Before using it again, make sure to feed it a few times to reactivate it.
Common issues with sourdough starters include over-proofing, under-proofing, and contamination. To troubleshoot, check your feeding schedule, storage conditions, and the overall health of your starter. A healthy starter should be bubbly, have a tangy aroma, and double in size after feeding.
By maintaining your sourdough starter properly, you’ll be able to bake delicious loaves of traditional sourdough bread using your favorite sourdough bread recipe.
Classic Sourdough Bread Recipe: Step-by-Step Guide
With this simple sourdough recipe, you’ll be able to craft a delicious loaf that’s perfect for any occasion. Making sourdough bread is a multi-stage process that involves mixing, kneading, proofing, and baking. In this guide, we’ll walk you through each step to create a beautiful, crusty loaf.
To start, you’ll need to mix your dough. Combine 1 cup of warm water (around 90°F to 100°F) with 1/4 cup of active sourdough starter in a large mixing bowl. Add 2 cups of bread flour and 1 teaspoon of salt. Mix until the dough comes together in a shaggy mass.
Next, knead the dough for about 10 minutes until it becomes smooth and elastic. You can do this by hand or using a stand mixer with a dough hook attachment. The key is to develop the gluten in the dough, which will give your bread its structure and texture.
After the bulk fermentation, it’s time to shape your loaf. Gently deflate the dough and shape it into a round or oblong loaf. Place the shaped dough onto a baking sheet or proofing basket lined with parchment paper. Cover it with a clean towel or plastic wrap to prevent drying out.
Proof the dough in a warm, draft-free place for about 4 hours, or until it has doubled in size. Be patient, as this step is crucial for developing the flavor and texture of your sourdough. Once proofed, your loaf is ready to be baked.
Preheat your oven to 450°F (230°C) with a Dutch oven or a preheated stone inside. Gently place the loaf into the hot oven and bake for 25-35 minutes, or until the bread is golden brown and sounds hollow when tapped on the bottom.
Following this easy sourdough bread recipe, you’ll be able to create a beautiful, delicious loaf that’s perfect for sandwiches, toast, or just enjoying on its own. The process may take time, but the end result is well worth the effort.
The Art of Folding and Strengthening the Dough
To achieve the perfect crumb in your sourdough, understanding the techniques of dough folding and strengthening is essential. Folding and strengthening are not just mechanical processes; they are artistic steps that significantly influence the final texture and flavor of your homemade sourdough bread.
Folding involves gently turning the dough over itself several times during the bulk fermentation phase. This process helps in redistributing the yeast, developing the gluten, and removing any large gas bubbles that may have formed. The technique is simple yet requires a gentle touch to avoid over-working the dough, a common mistake that can lead to a dense loaf.
Strengthening the dough builds upon the folding technique by ensuring that the gluten network is well-developed. This is achieved through a series of folds and gentle manipulations of the dough. The goal is to create a dough that is both strong and extensible, capable of holding its shape while still allowing for good oven spring. For sourdough baking tips, maintaining a consistent temperature and handling the dough gently are key.
By mastering the art of folding and strengthening, bakers can significantly improve the quality of their homemade sourdough bread. It’s a matter of practice and patience, but the reward is a bread that is not only delicious but also has a satisfying texture and appearance.
Bulk Fermentation: The Key to Flavor Development
The process of bulk fermentation is crucial in developing the complex flavors associated with artisan sourdough bread. During this stage, the dough undergoes a significant transformation, as the microorganisms in the sourdough starter break down the sugars and produce lactic acid, contributing to the bread’s characteristic tanginess.
Bulk fermentation is a critical step that requires patience, as it allows for the development of the dough’s flavor and texture. The length of time for bulk fermentation can vary depending on factors such as temperature and the strength of the sourdough starter. Generally, a longer fermentation time will result in a more complex flavor profile, which is a hallmark of traditional sourdough bread.
Optimizing Bulk Fermentation To optimize bulk fermentation, it’s essential to maintain a consistent temperature and ensure that the dough is handled gently to prevent over-working. This stage is where the foundation of the bread’s flavor is laid, making it a critical step in the production of high-quality artisan sourdough bread.
By understanding the importance of bulk fermentation and how to manage it effectively, bakers can produce traditional sourdough bread with a rich, nuanced flavor that is characteristic of this bread type.
Shaping Your Sourdough Loaf
To achieve a perfectly proofed sourdough loaf, mastering the shaping process is essential. Shaping is not just about giving the dough a desired form; it’s a critical step that affects the final texture and appearance of your sourdough bread.
When shaping your sourdough, it’s crucial to handle the dough gently to avoid developing excessive tension in the dough. This gentle handling helps maintain the delicate balance of the dough’s structure, which is vital for achieving an even proof. Start by gently deflating the dough, releasing any air bubbles that may have formed during the bulk fermentation phase.
The actual shaping involves creating a smooth, taut surface. This is achieved by folding the dough onto itself and then rotating it to create surface tension. The goal is to create a loaf that is not only visually appealing but also has a uniform crumb structure.
For a simple sourdough bread recipe, maintaining the right tension is key. You want the dough to be tight enough to hold its shape but not so tight that it tears. Practice makes perfect, so don’t be discouraged if your first attempts at shaping sourdough don’t yield the desired results.
Following an easy sourdough bread recipe that includes detailed shaping instructions can help. Remember, the key to a beautifully shaped loaf lies in the gentleness and precision of your handling.
The Final Proof: Patience is Key
After shaping your loaf, the next crucial step is the final proof, a period that requires utmost patience. This stage is vital in developing the flavor and texture of your homemade sourdough bread. During the final proof, the dough relaxes and rises again, enhancing the bread’s structure and flavor profile.
The final proofing stage typically lasts several hours, depending on factors like temperature and the strength of your sourdough starter. It’s essential to provide a conducive environment for your dough to rise. A warm, draft-free place is ideal. You can cover the dough with a cloth or plastic wrap to maintain humidity and prevent drying out.
Determining when the loaf is ready to bake is crucial. Over-proofing can lead to a collapse, while under-proofing might result in a dense loaf. Gently poking the dough can help; if it springs back slowly, it’s ready. Another method is to check for a slight increase in size and a few visible bubbles under the surface.
To achieve the perfect crust, maintaining the right environment during the final proof is key. Ensure your dough is at room temperature before baking, as this helps in even baking and crust formation. The final proof sets the stage for a beautifully baked loaf, making patience during this stage a worthwhile investment in your sourdough starter guide.
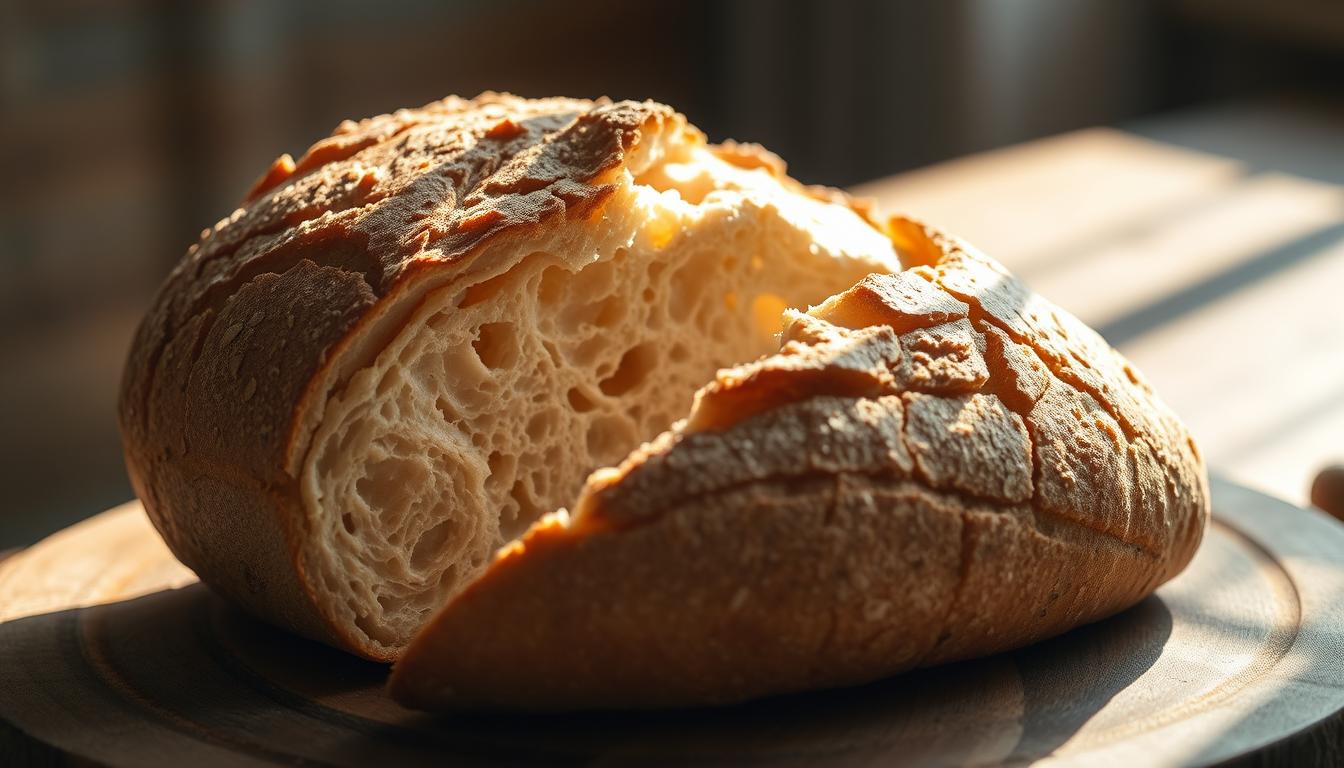
Scoring and Baking Your Sourdough
The moment of truth arrives when you score and bake your carefully crafted sourdough loaf. Scoring, also known as slashing, is a crucial step that not only adds to the aesthetic appeal of your artisan sourdough bread but also controls the way the bread expands during baking.
To score your sourdough effectively, use a sharp blade or razor, making swift, confident cuts about 1/4 inch deep. The number and pattern of cuts can vary depending on the desired design and the type of bread you’re making. For a classic look, a few diagonal cuts or a simple cross on top can be very effective.
After scoring, it’s time to bake your sourdough. Preheat your oven to a hot temperature, typically around 450°F (230°C), with a Dutch oven or baking stone inside. Gently place your scored loaf onto the preheated stone or into the Dutch oven. Baking times can vary, but a general guideline is to bake for 25-35 minutes, with the first 20-25 minutes with steam (if using a Dutch oven) to help create a crispy crust.
Key sourdough baking tips include ensuring your oven is preheated correctly and using steam to enhance crust development. After baking, let your loaf cool on a wire rack. This patience will be rewarded with a beautifully baked artisan sourdough bread, full of flavor and texture.
By following these steps and tips, you’ll be well on your way to creating stunning and delicious sourdough loaves that will impress anyone. Happy baking!
Flavor Variations for Your Sourdough Bread Recipe
Experimenting with different ingredients can transform your simple sourdough recipe into a variety of delicious breads. By incorporating herbs, spices, nuts, and seeds, you can create unique flavor profiles that enhance the traditional sourdough bread experience.
One way to add flavor is by introducing herbs such as rosemary or thyme into the dough. These herbs complement the natural tanginess of sourdough, creating a savory and aromatic bread. You can also add spices like cinnamon or nutmeg to give your sourdough a sweet and warm flavor, perfect for toast or sandwiches.
Nuts and seeds are another great addition to sourdough bread. Walnuts or almonds can add a delightful crunch, while sesame or sunflower seeds provide a nutty flavor. Feel free to mix and match different ingredients to create your perfect loaf.
Tips for incorporating new ingredients: Start with small amounts to ensure the added flavors don’t overpower the natural taste of your sourdough. Experiment with different combinations to find your favorite. Remember, the key to a great sourdough is patience, so don’t rush the process.
By exploring various flavor variations, you can keep your sourdough bread recipe exciting and fresh. Whether you’re making a traditional sourdough bread or trying something new, the possibilities are endless.
Troubleshooting Common Sourdough Problems
Even with a great sourdough starter guide, things can go wrong, but knowing how to fix them is key to success. Making sourdough bread is an art that requires patience and understanding of the process.
One common issue is over-proofing, where the dough becomes too relaxed and loses its structure. To avoid this, keep a close eye on your dough during the bulk fermentation phase. If you notice it has become too bubbly and is starting to collapse, it’s time to shape it.
Another issue is under-proofing, where the dough hasn’t fermented enough. This can result in a dense loaf. To fix this, ensure your sourdough starter is active and healthy, and give the dough sufficient time to ferment.
Using an easy sourdough bread recipe can help you avoid many common pitfalls. However, it’s also important to understand the basics of sourdough bread making, such as maintaining the right temperature and environment for your dough.
By being aware of these potential issues and knowing how to address them, you’ll be well on your way to creating delicious sourdough bread. Refer to your sourdough starter guide for tips on maintaining a healthy starter, which is crucial for a successful bake.
Conclusion: Your Journey to Sourdough Mastery
Mastering the art of sourdough bread baking is a rewarding journey that requires patience, practice, and dedication. With the simple sourdough bread recipe and techniques outlined in this article, you’re well on your way to creating delicious homemade sourdough bread that will impress family and friends.
As you’ve learned, creating a sourdough starter, maintaining it, and baking a beautiful loaf involves understanding the science behind sourdough and being willing to experiment with different flavor variations. By troubleshooting common problems and continuing to practice, you’ll refine your skills and develop your own unique sourdough bread recipe.
Now that you’ve reached the end of this guide, it’s time to put your new skills to the test. With every bake, you’ll become more confident and proficient, and the joy of sharing your homemade sourdough bread with others will make the journey even more fulfilling. Happy baking!
FAQ
What is sourdough bread and how is it different from regular bread?
Sourdough bread is made using a natural starter culture instead of commercial yeast, giving it a unique flavor and texture. The lactic acid produced during fermentation contributes to its characteristic tanginess.
How do I create a sourdough starter from scratch?
To create a sourdough starter, mix equal parts of flour and water in a container, and let it rest in a warm, draft-free place. Feed it regularly, and within a few days, it should start to bubble and emit a sour smell.
How often should I feed my sourdough starter?
The frequency of feeding your sourdough starter depends on the temperature and activity level. Generally, it’s recommended to feed it once a day at room temperature, or once a week when stored in the refrigerator.
What type of flour is best for making sourdough bread?
Bread flour or all-purpose flour with a high protein content is ideal for making sourdough bread, as it provides the necessary structure and texture.
Can I use instant yeast along with my sourdough starter?
While it’s possible to use instant yeast with a sourdough starter, it’s not recommended, as it can disrupt the natural fermentation process and affect the bread’s flavor and texture.
How do I store my sourdough bread to keep it fresh?
To keep your sourdough bread fresh, store it in a cool, dry place, or freeze it for longer storage. You can also store it in a bread box or a paper bag to maintain its crustiness.
What are some common issues with sourdough bread and how can I troubleshoot them?
Common issues with sourdough bread include over-proofing, under-proofing, and dense crumb. To troubleshoot, check your dough’s temperature, proofing time, and handling techniques, and adjust accordingly.
Can I make sourdough bread in a bread machine or using a stand mixer?
While it’s possible to make sourdough bread using a bread machine or stand mixer, it’s not recommended, as these machines can over-mix and over-proof the dough, affecting its texture and flavor.
How can I achieve a crispy crust on my sourdough bread?
To achieve a crispy crust, bake your sourdough bread at a high temperature, use a baking stone or baking steel, and ensure good airflow in your oven.